Tuesday, 29 July 2014

It's Hunkydory......

Morning all.... 

Where does the time go?? It seems to be whizzing so quickly through this year, it will soon be time to put my Santa Countdown on my ol' blog.... 

This week saw me make a big change to my crafty life. I have given up Docrafts, and my last demonstration for them will be at Doncaster this Sunday. It was a decision I came to after alot of thinking and wondering (as you do!) and everything considered, decided it was for the best. 

It has given me lots more free time to play work with my Tonic dies too... so much fun ahead and more cuddles with my Jodie... what more could I ask for?! Tonic as a whole are a fantastic set of folks to work with and I couldn't have been made to feel more welcome and part of the team by Jodie. Love that girl!

This week saw me up at Hunkydory in Preston demonstrating for Tonic, and featured mainly the Beautiful Bramble, Vine and Twine dies... aren't they beautiful?! So this morning I thought I would share a little bit of inspiration from the demo and put a few cards up. These were quick demo's but I hope you like them. 


This card above features embossing folders, dies and the lovely sentiment dies that came out a while ago. Quite a simple card, but I used a pink and grey colour combination which I love. 


This is the Beautiful Bramble... love it! So fine and elegant. I have drop shadowed the die cut and added some mirror card behind it. I used a little decoupage for the centre, but this can be anything you wish. 


The vine oval is just great to give your cards a different look. You can see how the Twine corners work perfectly at the sides of the shape. The little flowers were punched, shaped and inked from the Tonic punches. 
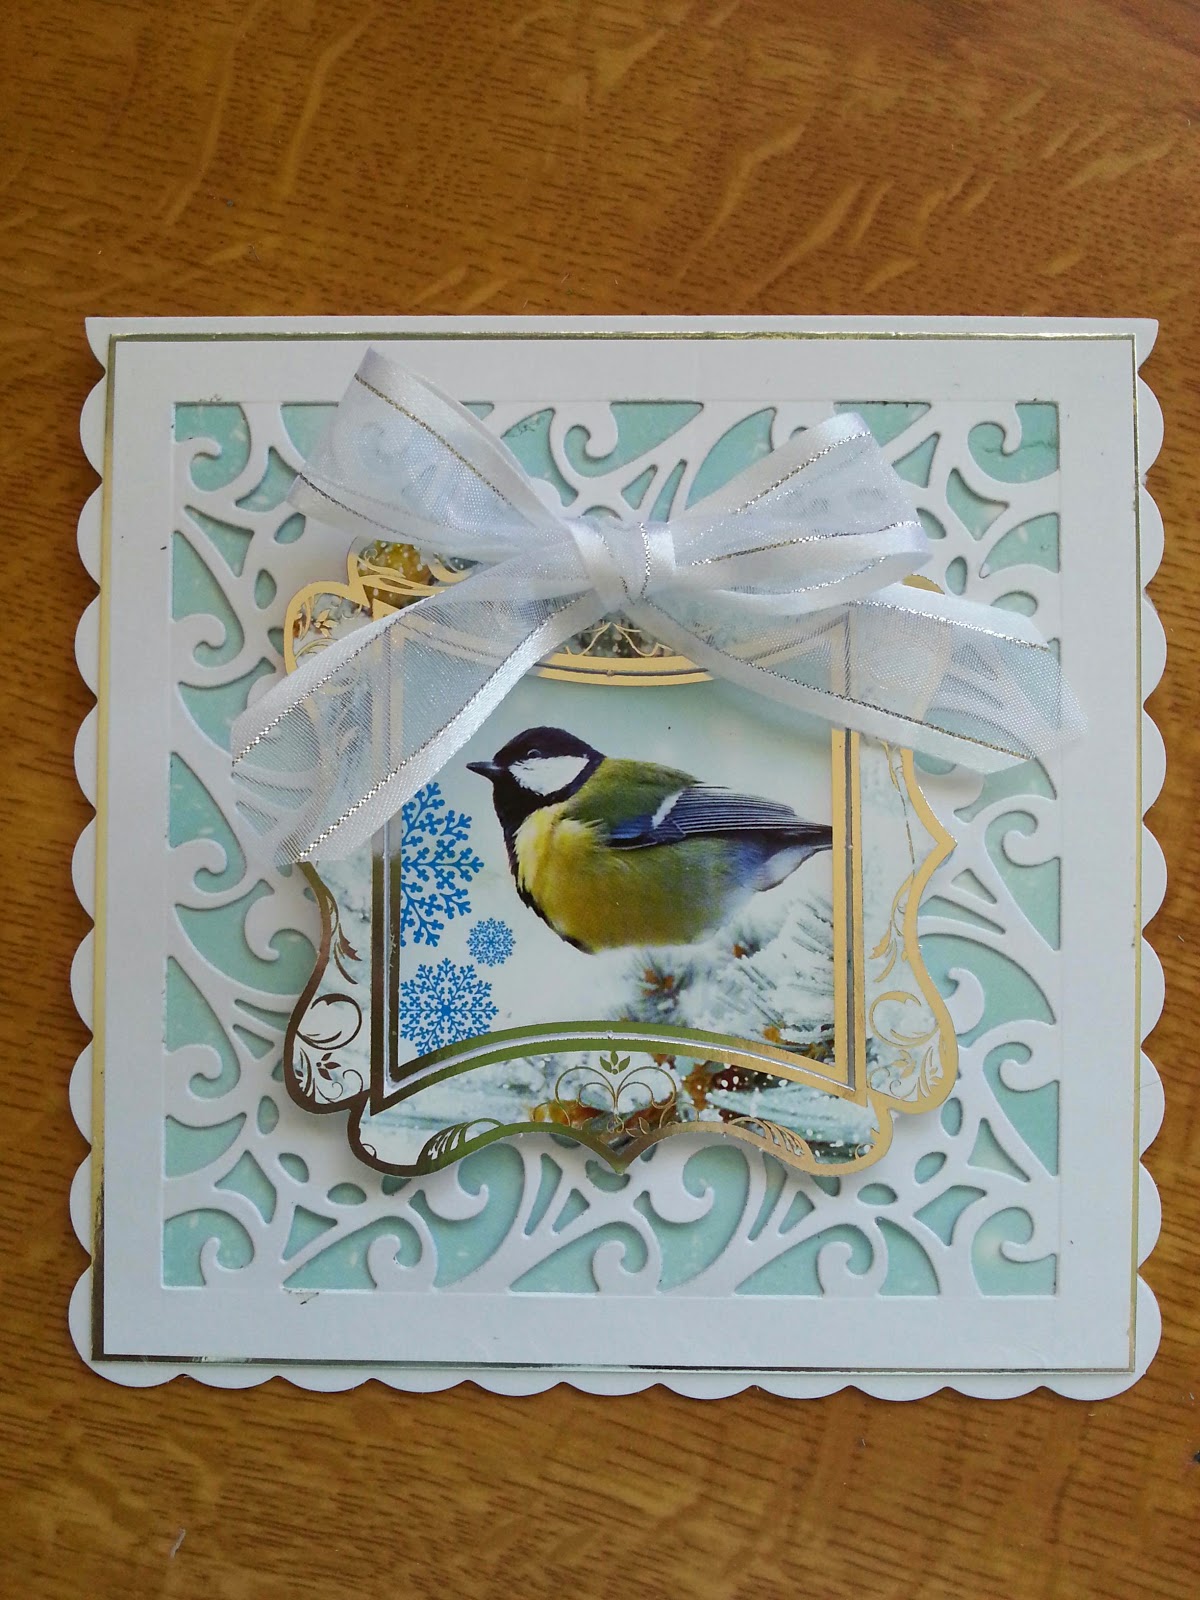
And finally, a little Twisted Twine card. Simply cut and mounted onto a layer of snowy blue background paper and a little topper that I found in my stash last week. Love the Great Tit... one of my favourite birds. So pretty. 

I hope you like my little selection of projects for today... Onto today's To Do list now, and samples need making, things need doing and cleaning .... well, I think that can wait for a few hours. 

Happy Crafting all!

Friday, 4 July 2014

Cricut meets Tonic!

Isn't it funny... when you start playing with things in the craft room, how one thing tend to lead to another!

I absolutely love the new sentiment panels from Tonic, and the matching dies, so this was my starting point. I was playing around with the new Christmas ones and layering them up. I did a shadowing with a piece of pink cardstock and then decided to keep the background quite simple. 


Looking through my cartridges for the Cricut the other day, I saw this shape on my Christmas one. I also had some cricut markers that I've had for a while, so thought I would give them a go. 

The marker I chose was a brown colour, and I scaled up the image to draw around 5 inches. I love the fact you can watercolour over the drawn image too... so I used a distress marker to add a pink shade to the image. 

I added some liquid pearls to the design too, and edged it with a little bit of glitter to add some bling. 

And look at the sentiment... isn't the font just awesome! I love these panels. 


The panel itself is white based, which means that you can colour it, ink it, spritz it - generally, do what you want to it colourwise. I chose to edge it with a little bit of gold ink to shade it to the cream of the Centura pearl that I'd used to draw the image onto. 


And that is my post for today. I loved making this card. I loved getting creative with the cricut even more.... technology isn't really my strong point (unless it comes to photoshop and photo editing! lol) so I really feel like I've achieved a little bit of success with this card. 

I hope you like it too... how do you mix your crafting stash? Let me know... I'd love to hear about your 'cross-purposing'!

Until next time... happy Crafting xxxxx

Wednesday, 25 June 2014

Elongated box from Tonic

Helloooooo eveyone... how are you all???

Today, I'm back with a little photo tutorial for you, as I have been asked quite a few times how to do this since Jodie showed my box on Create and Craft. It was this one here... 


It's quite difficult to try to explain how to cut the die on a message, so thought I would get out the camera on my phone and take a few snaps for you. Sorry about the quality of the pics, but I hope you find them useful. 

Firstly, lay your die onto your A4 cardstock, towards the bottom. Now, you can use it as it is obviously, and you will get two boxes from one A4 piece of card... but we are cutting just the one. 


Put your cutting plate over the die, but leave the top edge out of the layer. You do not want to cut this area just yet, you are just aiming to cut the main part of the box and the sides. 


Put the die through your machine, pushing the top plate through first to make it easier... It will only apply pressure to the area where the top plate is. 


You can see on this photograph below what parts are cut. 


Move the die up a little on the cardstock so that the sides line up perfectly with the precut sections. You need to remember to leave a little overlap on the base so you don't recut this section. 


Line up your top plate again, leaving out the bottom edge.


Run this through the machine again in the same way as before to finish the cut of the box. 


Fold up your box, stick together and you can see you have a lovely 6 inch box.. (use cardstock rather than paper as I have done!)


I hope that helps you all a little to get a bit more from your box die. It's a beautiful design as you can see in the top photograph, and decorated with the panels makes a perfect little gift to give someone. 

Back soon... happy Crafting.. until next time!!!

Sunday, 22 June 2014

A little bit of Heaven...

Evening all... 

So sorry that I haven't been about alot over the last month (really.... that long???) but things took over and time was a little limited to sit and play at blogging... 

but I'm here. And I've lots of lush things to show you, but for tonight, for my quick blog post, I thought I would share with you, my little piece of heaven where we spent five days for my birthday. 

My wonderful daughter decided to book us a few days away at a wonderful place called Longlands in Devon. Honestly, I didn't want to come home... I could have quite happily have squatted in me ol' tent forever. Yes.. you heard me right... tent... and this is it... 


I mean, it's not camping per-se but never the less, it was a fantastic week spent under canvas. To be truthful, it was glamping. The safari tent had running water, albeit not hot unless you lit the water heater, a loo, and beds... but no electricity, no tv, and no cooking facilities unless you lit the wood burner. And it was idyllic. We spent most of our evenings sat out on the veranda looking out at wonderful sunsets and scenic views. After dark, there was absolutely NO light whatsoever, so you could see every single star in the sky. It was totally amazing. 


We did get out an about, and spent our days doing different things together and alone. Carley and Martina decided they wanted to do surfing, so one day they went to do that whilst me and their dad nipped off to Clovelly and surrounding areas. It was perfectly sunny and warm most of the time, a little rain mid week, but nothing that stopped us doing anything... and how perfect is this view?!


We also went on an Exmoor Safari with the excellent host, Neil. A very knowledgable and lovely guy who gave us a great tour around places everyone can go, and people can't go... so it was very special. 

The views were amazing from Exmoor, and the tales told, views seen, information absorbed and places visited were all absolutely fantastic. 


And look at this little beauty... Exmoor ponies at their best. We saw lots of wild ponies close to the landrover, and were pleased that the babies were not too shy to say hello. We also saw lots of wild deer, buzzards and more.


All in all, we had a fantastic week, and it seems so distant now.. but we are planning a return visit next year... for a little longer next time. Same place - Longlands - as it would be lovely to see Bella and the team again. And of course her three little puddytats who came to say hello quite often. This was especially nice as our three furbabies were having a little holiday of their very own in the care of Andrea and James at Holmewood kennels. Very spoilt, chicken and tuna handfed babies they were too! No wonder they didn't want to come home!

Anyway... it was only a quick post... I promise I will be back quicker next time... please keep checking by and say hello. It would be lovely to see you back. xxxx

Thursday, 22 May 2014

Just a note...

Oh what a morning it is.... after nearly a week of lovely, sunny and hot weather, it has decided to rain... and rain is a slight understatement!! It chucked it down!

So today, I have decided to dig into the past and find something really colourful and springlike. 

These two cards were projects I made for previous issues of Cardmaking and Papercraft magasine. And I admit, this top one is my favourite... totally different to something I would normally make, but I enjoyed using toppers and card candi, keeping the card quite simple but pretty. 


I added a little bit of glitter and sparkle to the outside edges of the layers to decorate it up a little more.


This was a simple little stamped image, made for a Thank you card. I opted for a lovely stamp of a cute little girl (Woodware, I think!) and did a bit of paper piecing for her dress and bow.


Paper piecing is a great way of adding colour to your projects if you are not brilliant at colouring. It can be a bit tricky, but is worthwhile persevering with as it can give you a great look on your project.

I added glitter around this one too, then finished it off with a few little gems here and there.

Onto today's schedule, I am back to making samples and hoping to fit in a little colouring and stamping later again. Yesterday, I did a bit of a one-to-one teaching with my sister in law, showing her the glories of colouring with pencils (bulk standard, cheap colouring pencils, or watercolour) and blending with a little bit of essential oils. I will try to do a video at some point for this this week, as I have been asked quite often.

It is a bit of a misconception that you need special pencils to do a blended technique, you absolutely don't. I do have prismacolour and polychromos pencils and the like, but generally just use my £12 box of steadtler pencils and they do exactly the same... !

Well... onto work ... and I will get back to chat a little more tomorrow...

Happy crafting everyone!!!!

Wednesday, 21 May 2014

Coffee anyone?

Gooooood Morning campers.... Hi de Hi.. 

Well, I told you that I would be back with a post with more inspiration, and here we are.. but firstly, would anyone like a coffee?

Not that I drink latte, or coffee, that often, but doesn't it look lovely? This was a break in shopping yesterday at Marks and Spencers, and the young lady who was in charge of the latte machine did this!! I mean, how lovely does that look? And she didn't use a template or anything! To say I was impressed is a very large understatement, so I had to take a photograph. 

And what's more..... when hubby drank the drink the pattern stayed at the bottom of the cup. Brilliant! I know.... little things.....

Today, I am going to show you a card I made using the new Header dies from Tonic. I love how this card came together. The header dies make the cards look exquisite and so pretty. And of course, you can use them as I've done here on all four sides of the card to give you a different shape.


The centre panel is raised on foam pads to give the card some height and a simple sentiment placed into the centre as a focal point.


Here's another angle for the picture for you. 


Now... the little picture below is one I found on Pinterest the other day when I was having a mooch, and thought I'd share.. I really need to remember this!!!

Tuesday, 20 May 2014

Flowers and Butterflies...

What a wonderful combination to start a new lease of blogging with. 

Yes.. I'm back. I have had a break from blogging - unintentionally really - as I just haven't even given it a thought about blogging amongst doing other things. I've been out and around doing demo's here and there, and one of my demo's was out at Mountain Ash Crafts on behalf of Tonic. What a lovely place!

Here is one of the cards I made whilst I was there. I used the Tonic intrica punches, this one being the Regal Border, and I double backed it to create the strip along the edge. It makes your card look lovely and lacy. 


The stamp is one I used on the day from the shop, I think it's Woodware if I remember rightly. But what a lovely image. I think this needs to be on my hit list to purchase when I get around to it.

I finished the card off with a few pearls and a little bit of sparkle.

The card below is one I made for my Craft Clinic show on Create and Craft, again for Tonic, using their fantastic range of products... One this one I used the Butterfly border punch.

The border punches like a normal border, but gives you a lovely 4cm edge. So deeply detailed and full of gorgeousness! But as you know, you can also use it to go around a circle, so this circle was a 5.75 inch circle ( or the largest layering circle in your Tonic set) and you can see, it punches perfectly.


I finished it off with a greeting die, and a few Craftwork Cards Candi circles to match in with the lime green.

In addition to making projects for Jodie, shows, demo's and suchlike, I have also enjoyed being out in the garden taking photographs of my flowers. These tulips were put in last minute and I really didn't expect to have such a good show of colour, but as you can see, they look wonderful.


There are a variety of different ones that we picked up as a reduced lot inthe supermarket, and we just 'shoved' them in the garden hoping they would do something, with the intentions of moving them later on. They came out beautifully. Here are a couple of my favourites.


This one above is such a dark chocolate red colour. It's stunning. I only have around 4 or 5 of these ones but may look into getting a few more. They add a dramatic colour to the border and have kept their shape beautifully despite all the rain this week!


This one is another favourite. And it was from a pack called Sugar Candy (if I remember rightly). The colouring on the petals is lovely.. there were pink, yellow and lilac colours in the pack. Just lovely. 

Well... that's all for today. I will try to get back again at some point later to upload a few more projects for you from my demo's... *will try* being the words I need to remember. lol. 

Until later.. have fun. xxx

Tuesday, 8 April 2014

A rose is a rose....

Morning all.... 

Sorry it's taken a few days to get a few samples on here for you, but I've been out working this weekend... I was out at Sophies in Oldham doing a demo for Docrafts on Saturday, and then at the Range in Bolton on Sunday. It's been quite a busy weekend, and thank you to all the lovely ladies and gents who popped by to keep me company and share ideas. It was lovely seeing some new faces. 

Here's one of the cards that I had with me in my samples boxes. And it is mainly to show the different ways you can use embossing folders. 


The embossing folder I used on here is the 6 inch square rose embossing folder, Rose Frame. And it is so pretty... But for this card, I embossed the corner of the folder onto the top of the oval die cut.

As the Artiste inks are on 3 for 2 at the moment in store, I have inked up with a few colours to make the rose stand out a little.

The papers are from the Gorjuss pack, and they are so beautiful and pretty. Love them lots!


The lettering on the card above, and the one below, are from the Xcut alphabet dies, two different sets.

This card below has the roses embossed onto a tan coloured card and also cream. I tried to keep the card quite simple, and I think it works well.


Again, the roses and embossing details were shaded over with a few colours of ink and the strips of paper on this card were crumpled before inking over with brown ink. This just added to the distressed look.

The hearts were pricked around with a pricking tool, and a few gems added for that bit of sparkle!


I hope you like today's card... I have got the next post sorted and I know what I'm posting... so check back in a couple of days and it'll be updated. Yes... I know... promises, promises, but I have a busy week and need to schedule! lol.

Until next time... happy crafting!

Thursday, 3 April 2014

Sssshhhhh...

Awwww. Little Humphs being a sleeping beauty. He was absolutely sound asleep when I took this, snuggled into the side of the sofa next to my arm.

Cuteness or what!

Wednesday, 2 April 2014

Just the Tonic...

Good Evening one and all.....

Tonight, I thought I would just nip on after a short while away and upload a few projects.

I know I keep saying that I am going to get back into blogging again, and what with one thing or another just never seem to find a minute to do it!

I have had a busy few weeks really.... back doing my demo's on a weekly basis for Docrafts, as well as getting acquainted in my new role as a partner to the very lovely Jodie Johnson from Tonic! Yes!!! Can you believe it??!! I know I can't.

I haven't said too much about it before, but I've been liaising with Jodie for a few months now about things, and have done demo's at a couple of craft shows on behalf of Tonic. One at Manchester and also at the NEC. And to be honest, I have loved every single minute of it! Die cutting is my passion, as well as colouring, and I can cut and colour to my hearts content. What a fantastic job eh?!

So, yes. I am working with Tonic. I had the pleasure of nipping off on a road trip to Wales a few weeks ago to meet up with the team, and they are all so lovely. Laughs were shared, and products were played with! I am now in the throws of sorting out sample boards and making a huge mess on my craft room floor... lol. Jodie would be sooooo proud!

Anyway... other news... now what do I have to tell you since last time?

Well.. my demo's are going well with Docrafts, and on the side bar over there (------->) you will see where I am. And I will do my utmost to keep it up to date. We have some lovely Gorjuss girls, the elegant Bellissima range and the new Oyster Blush collection.... so lovely!

Here are a few of my Tonic makes that accompanied me to the NEC..


This one was one that everyone seemed to comment on. It's the box card with the lovely Deco Frame Die - Emily - and it is soooo pretty it just has to be my favourite. Such a fine detailed die and the swirls can be cut to fit around any size card if you wish.

The butterflies and flowers were part of an old Kanban sheet that I had, but I thought the colours went really well with the die cut.


This simple birthday card also features a Kanban topper from my stash, but I have decorated it quite simply with the Tonic Forever Moments Embossing folder (Amelia) and also one of the new Intrica punches - Regal Border. I have gone over the embossing with a little Gilding Wax too.


This cutie was a Hobby House topper that I cut to fit in the recess of one of the box cards, then decorated with a shadow cut and layered frame from the Tonic Forever Moments deco frame die - Ivy. 


This little box card was looking a little worse for wear when I got it home.. but the decoupage was so cute I had to photograph it to show you!

The frame was an Intrica punch Elegant Drape Border and the corners were from the Forever Moments Deco Frame Ivy. So pretty and it went so well too. The border was cut to a 45 degree angle at the corners and pieced together. 

I hope that you like today's little shares... I will be back (PROMISE - with a capital P) tomorrow to share a few demo samples with you too. 

Until then... happy Crafting!
Animated Social Gadget - Blogger And Wordpress Tips