Showing posts with label promarkers. Show all posts

Wednesday, 5 October 2016

Seasons Greetings from me.....

Hello my little bloggeroonies... 

Something a little different from me today, as I have been playing with a few products that I was sent from the fantastic company of Stix 2. As you may know, they do those awesome adhesives, but not only that... they also do a few things that I've featured on my card. 

So... where to start? Well, this is the card I kmade, and as usual, I started with the background colours of cardstock and papers as I knew I was going to be using a Woodware stamp to create the card. This is one of the easiest ways of choosing your colours - 1. Choose the paper and card colours. 2. Colour your image to match the card. 

On this one, I went for a lovely pale dove grey and slate grey card. The papers were in a new set of Joycrafts designs that I got and the greys matched perfectly. 


I scored my A4 card in half, then trimmed it down to create a square card measuring 15cm x 15cm. The dove grey layer was cut to 13.5cm x 13.5cm. The next layer to 13cm x 13cm. Then the DP was cut to 12.5cm x 12.5cm. From now until the end of the cutting and prepping, nothing was stuck together unless I mention to. I know... bossy right?!

Around the edges of the card and the DP I used the Stix2 Layer Perfect tool to create my sweet dotty pierced border. It makes light work of ensuring everything is nice and level, and that the holes are even. Easy peasy. 

I used the same cardstock to cut my frames. I cut two from the Dove and Slate Grey card and did a little inking and drop shadow work with it. *Drop shadowing is simply where you layer one on top of the other and slide it down and to the side to see both bits of cards, creating a shadow*. 

I stamped my chosen image using Momento ink, Tuxedo Black and coloured with Promarkers. I added a little bit of dark pencil to add extra shadow. Once the colouring was finished, I cut around the outside edge of the image leaving the middle intact. I dusted around with a little distress ink to add some shading. The bow was stamped twice, coloured and cut out then used to add dimension. 


So now comes the fun piece of sticking everything together. I stuck my base layers together, upto the DP and the slate grey it sat on. I glued these together, but didn't attach to the card as I wanted to add the seed beeds and glitter to the borders. I used a little PVA glue and sprinkled them around the outside edge. Leave it to dry to ensure they don't move around. 

Once dry, attach it to the card using the foam pads and add your frame to the centre of the card front. In the centre of the frame, mount your stamped image using foam pads to add dimension and finish off with a little of the clear glaze over the berries. 


I love how the sparkles look... they make a real change from using mirror card. I hope you'll agree. 

Here's the shopping list if you would like it. I hope you like the card as much as I have enjoyed making it. Happy Crafting!!!

SHOPPING LIST

Stix 2 Layer perfect tool (557321)
Stix 2 Seed glitter (57080)
Stix 2 Ultraclear Tape
Stix 2 Tape Runner (red - high tack) (557269)
Stix 2 Craft foam strips (557318)
Woodware Holly Wreath stamp - (FRS102)
Docrafts Outline Stickers - Traditional Christmas sentiments (PMA810907)
Promarkers - Pear Green, Moss, Olive Green, Ice Grey 1.3.5., Red, 
Berry Red, Magenta, Caramel, Cinnamon
Papers and Diecut - JoyCraft!

Tuesday, 27 September 2016

Dogs, dogs, dogs....

You know... there's so much that I love about life, I can't begin to tell you.... but when it comes to my furry friends - or not so furry in the case of my goldfish!!! - then dogs and cats have to be up there with the best. Since we have been together, Mr P and I have never been without our furry friends. He had a cat called Lucy when I met him, and she had babies which gave us a large ginger and white tom, called Thomas. Yes, I know... very original

When we married we got our first doggie, a beautiful dobermann called Tasha. She was our baby, but unfortunately she died aged 6months old. A day permanently etched in our memory forever more. 

Since then, we have had a few woofers, a few more cats, as well you know if you are a regular reader of my blog, and we now have three spaniels, two cats and three fish. All very spoilt, but all very loved. 

So when my crafty friend Pamela showed me the Crazy Cats collection of stamps from Tim Holtz, I immediately fell in love and saw some quirky things that our cats did. Albeit, I never had chance to sit and stamp, then colour them in as I had too much 'other stuff' to do. Obviously that has changed in the past few weeks, and I am starting to enjoy my crafting again for me - finding things that I have scurried away for a rainy day.. 

Pamela also showed me her new collection of Crazy Dogs... of course, I had to have them and invested in the stamps and the matching dies for these. I got them from my lovely friend Donald who owns Craft World Scotland, and I must add what fantastic delivery he does too!!! Ordered one day, delivery the next. 

So... these dies were put to one side and last week I got them out and coloured them up. This is what I came out with. Very simple cards, but I hope you like them. 


I chose to use some lovely papers from the Santoro pack to have as my base on my card. The layers were cut on my Scan and Cut, which made it so simple to do whilst I got on with the important part of colouring my image! If you don't have the Scan and Cut, I can give you dimensions for the matting and layering, please leave me a comment to ask. 

The pens I used to colour this little fella are Promarkers and they are listed under Single Dog at the end of the post. I chose an olive green ribbon to go down the side of the card and the wording was also cut on the Scan and Cut. Just a simple 'Hello' as I don't often put sentiments on my cards. 


In the centre of the ribbon bow is a button that I got in a pack from Hobbycraft. I just snipped off the back loop from the button (not too close as you don't want the top bead popping out!) and used hot glue to fix it into place on the ribbon. I finished off the little guy with white gel pen and a fine line of blue highlight around to add some depth. I added some Nuvo drops to the corners as my little gems. 


This card is not as simple as the first one, as I had to do some masking off and stamping over with different stamps. If you haven't done this technique before, just ask, and I will try to do a little video tutorial for you. 

I used promarkers to colour the animals in - two from the dog set and a cat from the Crazy Cats. I am just in love with the characters of the animals - I can see elements of the stamps in my dogs and cats here - all crazy.. but cute!


The background was cut on the Scan and Cut again, using one of the Christmas corners from the USB. I cut it four times and joined them in the centres. Again, I used the machine to do the mats and layers and also the wording for the card. 


You can see where I have used the white gel pen on the images to add a few highlights. I also went around the outside of the inner frame with a red pen to doodle a little interior framework. This was because the doggy had a red collar on and I hadn't included any red anywhere in the card. This just sorta finishes it off. 

Well... that's it for now... I will be back to show you a few other things I've been upto... but for now, here's the shopping list for the things I used. Happy Crafting everyone!!!

SHOPPING LIST - SINGLE DOG

Momento Ink - Rich Cocoa Brown  (available from the Craft Barn)
Santoro Paper Pack - GOR 160109 (Available from Stuff for Crafts )
 Stampers Anonymous CMS5271 Tim Holtz  - Crazy Dogs (Available from Craft World)
Promarkers - (Available from Art of Craft)
Raw Sienna, Cocoa, Burnt Sienna, Marsh Green, 
Pear Green, Cool Grey 5, Baby Pink, Antique Pink 
White gel pen
Black card stock
White base card 8 x 8 inches
Offcut of green ribbon
One fancy button
Black Nuvo Drops or black pearl gems

SHOPPING LIST FOR GROUP CARD

Momento Ink - Rich Cocoa Brown (as above)
Stampers Anonymous CMS 5271 Tim Holtz Crazy Dogs (as above)
Stampers Anonymous CMS 251 Tim Holtz  Crazy Cats (follow link as above)
Post it notes to use for masking of stamps
Promarkers (available from Art of Craft, as above)
Sandstone, Cinnamon, Henna, Cool Grey 1, Cool Grey 3, Cool Grey 5
Red Poppy, Leaf Green, Marsh Green, Denim Blue, Mustard, Gold
Raw Sienna, Baby Pink, Antique Pink
Black card 
White card blank 8 x 8 inches
Red fineliner pen
White gel pen

Tuesday, 20 May 2014

Flowers and Butterflies...

What a wonderful combination to start a new lease of blogging with. 

Yes.. I'm back. I have had a break from blogging - unintentionally really - as I just haven't even given it a thought about blogging amongst doing other things. I've been out and around doing demo's here and there, and one of my demo's was out at Mountain Ash Crafts on behalf of Tonic. What a lovely place!

Here is one of the cards I made whilst I was there. I used the Tonic intrica punches, this one being the Regal Border, and I double backed it to create the strip along the edge. It makes your card look lovely and lacy. 


The stamp is one I used on the day from the shop, I think it's Woodware if I remember rightly. But what a lovely image. I think this needs to be on my hit list to purchase when I get around to it.

I finished the card off with a few pearls and a little bit of sparkle.

The card below is one I made for my Craft Clinic show on Create and Craft, again for Tonic, using their fantastic range of products... One this one I used the Butterfly border punch.

The border punches like a normal border, but gives you a lovely 4cm edge. So deeply detailed and full of gorgeousness! But as you know, you can also use it to go around a circle, so this circle was a 5.75 inch circle ( or the largest layering circle in your Tonic set) and you can see, it punches perfectly.


I finished it off with a greeting die, and a few Craftwork Cards Candi circles to match in with the lime green.

In addition to making projects for Jodie, shows, demo's and suchlike, I have also enjoyed being out in the garden taking photographs of my flowers. These tulips were put in last minute and I really didn't expect to have such a good show of colour, but as you can see, they look wonderful.


There are a variety of different ones that we picked up as a reduced lot inthe supermarket, and we just 'shoved' them in the garden hoping they would do something, with the intentions of moving them later on. They came out beautifully. Here are a couple of my favourites.


This one above is such a dark chocolate red colour. It's stunning. I only have around 4 or 5 of these ones but may look into getting a few more. They add a dramatic colour to the border and have kept their shape beautifully despite all the rain this week!


This one is another favourite. And it was from a pack called Sugar Candy (if I remember rightly). The colouring on the petals is lovely.. there were pink, yellow and lilac colours in the pack. Just lovely. 

Well... that's all for today. I will try to get back again at some point later to upload a few more projects for you from my demo's... *will try* being the words I need to remember. lol. 

Until later.. have fun. xxx

Friday, 14 February 2014

Beautiful blossoms...

Well... just as promised, here is the card. Doesn't she look lovely? I really love this image and I can't quite understand what took me so long to ink her up. 

She was coloured with alcohol pens (variety of different ones) and then extra shading was added with Pitt Pastels. Love those little pencils, I can tell you! Thank you Jak... me thinks it's a new obsession. lol. 


The little borders at the top and bottom were cut from a Marianne Die, and then shaded up with a little bit of Gilding Wax. 

The flowers were die cut and shaped too. A little wax was used on those too, just to add a little colour. 


I hope you like today's card... I've kept it fairly simple. In fact, I was unsure whether to put the flowers on or not, but decided I would. However, it meant leaving the greeting off, but hey... I like it just how it is. 

Whatever you're upto today, I hope you find time to craft too... 
Until later xxxx

Thursday, 13 February 2014

Hope you didn't hold your breath??

Morning folks.

I know, I know, I know... I promise to write more often, but it was one promise that went awry!

I have had a bit of a busy time since Christmas, but am now looking at a few weeks off work which will let me finally finish sorting out my craft room and get some crafting in FOR ME!

You know how things get. You look in your diary and it looks a bit empty for February, then something pops up and you get offered something to do. That's what happened last week with Tonic. I was asked if I could cover for Jodie at a show in Manchester and after a nano-second thinking about it, of course I said YES!

I love Tonic products and I love die cutting. So it was really a win-win situation for me. I met lots of lovely crafters and some familiar faces too. I even managed to buy a few things for my new room. And a new bag. My bag is pretty awesome and has lovely owls on it!

Anyway.. enough of my coming's and goings.. and here's a little card for you.


The image that I've used is a digi I have on file from a long time ago. In fact, the image was coloured a long time ago using prisma pencils. She kept popping up on my desk when I was sorting out my room, and finally thought to myself she ought to be put on a card!

I have used the lovely Tonic border punch at the top and bottom and used the offcut from the punch to create another flat layer on top. I added some pearly dots and glitter too. Go me, eh?!


I also coloured this one in too....


She's a Penny Black image and one that's been in my Stamp Collection for a while (uninked like alot of others!)

Isn't she just lovely? She was coloured with alcohol markers (a variety of different ones!) and a new aquisition to my crafting stash - some Pitt Pastels. Thanks to Jak, who convinced me I needed them... and yes, I love them lots!

She will be put onto a card later when I've had another cuppa and done the wooflets breakfast. I WILL try to get back later to show you the finished result.

Right... must make a move... whatever you're doing today, do it with fun.

Happy Crafting!!

Tuesday, 22 October 2013

Morning all....

How are we all this morning? 

It's been a rather busy weekend for me, so today, I'm having a pyjama morning. On Friday, we took a little run to Lincoln to visit my daughter who is at Uni there. We went out for a lovely meal as a late birthday treat, and didn't get home until late. Saturday, I was demonstrating the current range of Docrafts products at Gadsby's, in Lincoln. It's always a pleasure to go there and even more so when Sue and Laura are in the shop. 

Sunday, I was working down at the Dome in Doncaster with Sharon, who owns Glitter Magic. She is Debbi Moore's sister and such a lovely person, just like Debbi. It was a very early start, and late finish, but I had such a great day. It was so much fun..! So, that was my weekend... what about yours?

This morning though, I did want to come on and show you a little card that I made for Cardmaking and Papercraft magazine a few months ago. 


I was asked to create something with this beautiful stamp from Little Claire, and of course, I love to stamp, so it didn't take me long at all to say YES!

I coloured the image using promarkers and added white highlights to some of the details on the bird. I also chose to restamp and layer up the wing and flower to give it a little more dimension.


The card was embellished with die cuts and finished off with a few liquid pearls. The corner dies are some that I managed to find at the Hobbyhouse a long while ago now. Aren't they lovely?! And the holly die... well... I just love this. It's one that I often use at Christmas as it goes perfectly with most things.

I hope you like today's card. I will be back shortly with another little project for you all.

Until then......happy Crafting!

Wednesday, 20 February 2013

Evening all....

Hi everyone.. 

How are we all today? It's another late one here as I've just been having a little browse around the net before I go to sleep, but thought I'd show you all a card I made the other day with a Besties image.

I've been struggling a little with tiredness and general worn-out-ness this past couple of weeks, so haven't had much energy (or inclination!) to do alot of anything really. I've been for my B12 jab today, so hopefully that will make things a bit better in the next week or so. It's a couple of weeks early, but I know that's what's wrong. I was the same a few months ago when it was due. 

The weekend went by in a bit of a rush really... I had a fantastic demo on Saturday up in Ackworth, near Pontefract. The shop was lovely, staff were so helpful, and everyone loved the projects I'd made and the ideas we shared. I'm back there again this weekend to do a Childrens demo, so pop by if you're passing.. there'll be allsorts going on - not just for the children, but us grown up big kids too! 

Anyway onto today's card. These images are so cute. And this little beauty was just sitting on my desk waiting patiently to be coloured in. lol. I usually start by importing them into my Digital Designer because I find it easy to scale the image to the size I want. I then print out onto my paper ready to colour in.


I have used the fab downloads from the Creativity Club for the backgrounds, and decided to add in some flowers, some die cuts, a bit of ribbon and some of our fab Docrafts twine...  and a punched border.. oh, and this little addition to her headband....


I like how she turned out, and as a finishing touch added some gloss over her glasses to give them a more realistic look. Do you likey?


Isn't she sophisticated? I love the little snail that she's holding too... it's cute face just finishes the card off I think. I'm all for cuteness me...


Anyway.. nighty night for now.. see you again tomorrow!

Thursday, 14 February 2013

A Challenge? Well... I don't mind if I do...

At last. Friday. It's been a very long week in one way or another. But one good thing is that I've managed to get some crafting done for me. I've sat and done a little bit of what I love - colouring in!

I came across a fab digi stamp artist a while ago called Sherri Baldy. Honestly, her characters are stunning... so today, I decided to open up my wonderful Docrafts Digital Designer and import a few characters to colour.

But then, I thought, why stop there... so I took a nosey at the Creativity Club downloads in the Docrafts website and chose a few papers to print out too! They matched perfectly with the style of card that I wanted to create... and here it is...


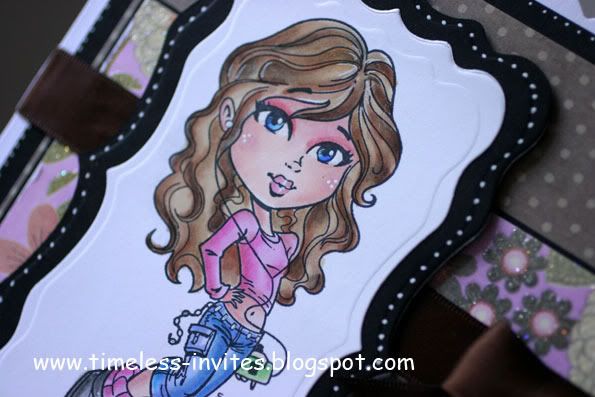
Isn't she adorable?? I love these images with their big eyes and beautiful shape faces. Just charming! And those papers... just beautiful!!!

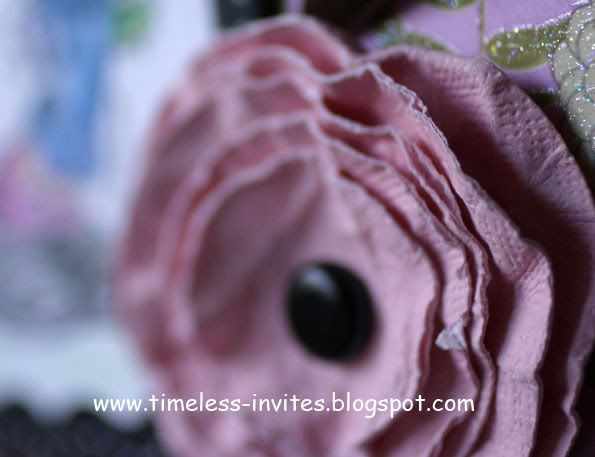
Here are a couple of close ups for you. Here you can see some details of the papers, flowers and a little of the colouring.

And just look at these papers.... the downloads in the Creativity Club section are fab. Straight at your fingertips and ready to print out! 


I have decided to play along with the Besties Challenge blog, so as my very first S.B. image I've spent time colouring (and totally enjoying!!) here's my entry.

Monday, 17 December 2012

All I want for Christmas......

Hello again....!

Two posts on one day! That must be a miracle if ever I knew one... lol.. but I just wanted to share this little creation with you. 

I've been busy over the weekend catching up with a few family orders for Christmas cards, and even had time to do my personal family ones!! At least the kids won't feel too left out now.. lol.  

I also had time to make this one - a cute little stamp I bought last month to make the hubby's Christmas card.


I began by choosing the papers I wanted to use so I could match up the colours for the stamped image. This makes it so much easier (when I remember to do it!)... lol.

I layered up the papers onto mirror card, but opted for red so it didn't look too girly. I thought red gave the card a little bit of bling, but also kept it quite masculine.


Decoration was kept quite simple with a little poinsettia and a holly branch die cut. What did I do without this die?!

I finished the card off with a little bit of liquid applique and a dusting of glitter...

I hope you like today's little share, I'm not sure if I'll get back for the next few days as I have some magasine bits to work through, so please check back - I'll update when I can!

Happy Crafting!!!

I would like to enter this card into the following challenge..

Promarker Challenge - One for the boys

Thursday, 29 November 2012

Loving the Tatty look

Firstly... I want to say Thank You to the Passion for Promarkers blog, as I've won a prize with this card... can't believe it! 


That really got my day off to a great start yesterday. I really enjoyed making the card above too - totally out of my comfort zone working with the grungy type of look, but I loved this card.

Today, I have lots of crafting going on ready for the weekends demo's and next weeks shows on Create and Craft. But the main thing is to try and stay warm! At least it's stopped raining now, all ready for the snow this weekend! Perfect!

Anyway.. onto today's post, and I'm feeling Tatty-fied again.. so thought I'd share this little card with you. I really love this new range from Docrafts, and the colours in the papers when combined with Kraft card are just beautiful.

Now, I'm not one for distressing edges etc, but did a little bit on this card. Check below to see how I did it.


How I did it... 

  • Work those edges - I decided that my main card was going to be cream because I wanted to dust around the edges with brown dye ink. I just plonk a bit of ink onto my glass cutting mat, then pick up the ink with a dry baby wipe which I wrap around my finger tip. Rub OFF then ON to the paper in a circular motion and you'll get those perfect dusty edges. 

  • Doodle it - When you have finished dusting around the edges of your paper, take an Artiste pen in a coordinating colour and create a couple of doodle lines around the edge. Try not to get them straight, keep them creatively wonky ( !! ) to make them flow a little simpler. 


  • Glitz and Glamour - If you dislike the feeling of glitter on your desk, or on your fingers, then with these decoupage images you don't need to worry! The glitter is encapsulated into the card so it doesn't shed. And all the decoupage is die cut. Win Win if you ask me!


  • To bow or not to bow - that was the question! So for this card, I decided to use wide cream Anita's ribbon and just simply loop it across the card. Stick a length of double sided tape across the card, then cut a length of ribbon longer than the card. Cut both ends to an angle, then stick onto your card, you can then loop equally on both sides of the image. 


  • Perfect layering - Kraft cardstock is one of my all time favourites at the minute. It really doesn't matter what colour cardstock you put it with, it will work perfectly! I used it with the Me to You double sided papers to contrast with the soft pinks and whites, and you can see just how lovely it is. 


Right.. onto today's work me thinks - housework first, then craft work next!

Whatever you're upto today, stay warm and safe.
Happy Crafting!

Wednesday, 21 November 2012

Oh little bear... little bear....

Morning folks...

Well, it's a very wet, miserable and grey day here in Doncaster again. Perfect day to get stuck in to making more samples for my upcoming shows on Create and Craft I think.. then I can sit and relax this evening. Great idea me thinks...

Today, I have something a little different to show... I have made a Christmas card to fit in with the challenge over at the Promarker Challenge blog. I just loves my alcohol markers, so it was great fun to get them out to play.

Here's my card.


Sorry for the quality of the picture - I must really get my camera back out and stop being so lazy, taking pictures on my phone... the quality really isn't that great!

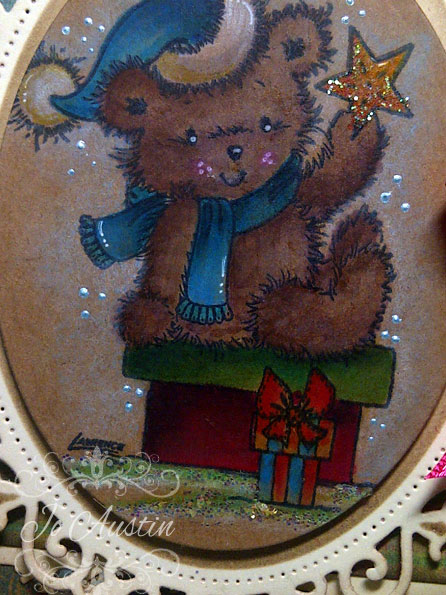
Anyway.. I've coloured onto the wonderful Papermania Kraft card, love this stuff... and I've coloured with the promarkers. I did add a little black shadow with pencils. I've noticed the oval looks really squint on this photo, in fact it is rather oval-ly and fits the frame really well!


Here's a little close up of the colouring.

I'll be back tomorrow with a really cute little commissioned card... hope you check back soon!

Friday, 27 July 2012

Playing with the colouring....

You know how much I love stamping? You know how much I love colouring? Well.... this card is the result of both of those things...

Now.... the image is one I fell in love with whilst doing my Docrafts demonstration at Derby Garden Centre the other week, where one of the girls who work there had done a stamped card using it... and she did an absolutely awesome job of colouring it!

I hunted high and low for the stamp as they had sold out at the store, and I found it eventually. So I just wanted to share my card with you.

This picture shows the papers that I chose to use for the colouring.. I always choose my papers first, then colour my image to match it in.. and these old Papermania papers were in my paper stash and I rediscovered them when tidying out my room the other day. They are just stunning. No wonder I found about three packs of them!!

The other thing that I like to do is to keep a track of what colours I've used for colouring.. so I stamp two images, and as I colour I make a colour chart. I note down the colour I used and what papers I used too, or even just staple a couple of pieces of paper to it, and keep it in a folder. It's a great way to keep track of your favourite cards.

Here are a few close ups for you.


I really enjoyed colouring this image... and I'm sure I'll be colouring it again soon!

Whatever you're upto today, I hope you enjoy it..

Happy Crafting!!

Thursday, 30 June 2011

With much love...

Today, I thought I'd show you this card that I've been working on. I made it as a birthday card for a young girl who always, more or less without fail, comes to see me demoing at Derby's Craft Central. She is a lovely girl with a wonderful nature.... and after a conversation with her and her mum last time, I know it's her birthday in August..

Well, as I am only there this Saturday, I am going to take it with me, but the greeting inside just says 'With much love' instead of Happy Birthday.. I mean - you don't give a card a month early do you?!

Photobucket


The image below shows what the inside looks like. I decorated it up to match with the front, although I've used a different shape for the greeting panel.

Photobucket


I got this stamp on a whim a while ago.. and thought I could use it for another birthday I have coming up soon for someone.. but isn't she lovely? Quite funky for a teenager I thought.

Photobucket


I made the flower from a range of circle dies... these are new from Docrafts - fab!! I had to use a couple of smaller punches for the inside of the bloom, but it still works.
Photobucket


I hope you like the card today.. More coming soon! And yes.. it'll be that 'C' word coming shortly! That's what I'm working on as we speak. (And actually, what I've been working on all last week too.. lol).

Merry Christmas.  Whoops.. I mean.. Happy Crafting!

I'm sharing today's creation with - 

TSG Challenge - die cuts
KB Challenges - Use flowers
Crazy Challenges - Beautiful women
I Love Promarkers - include flowers
Divas by Design - die cuts and punches
Crafts and Me - birthdays

Wednesday, 29 June 2011

Sweet Baby

I think I just managed to get this one in time... I started it yesterday, and couldn't really decide what to do with the image after I'd coloured it... usual story really.

But, I found a lovely sketch over at Willow Designs blog and a great theme over at the Passion for Promarkers blog, so thought I'd play along.

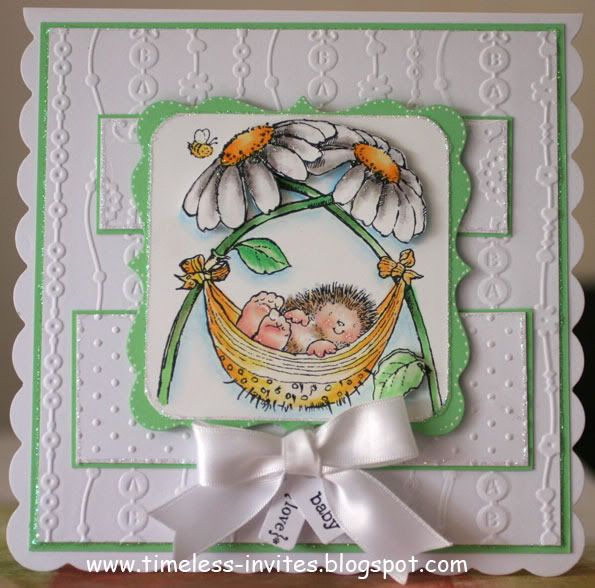
Very quickly uploading it now.. but here's the finished card.

Photobucket

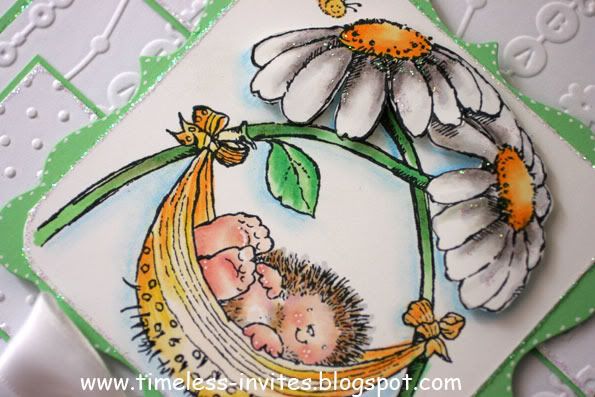
I've used a variety of embossing folders to keep the card really clean looking.

Photobucket

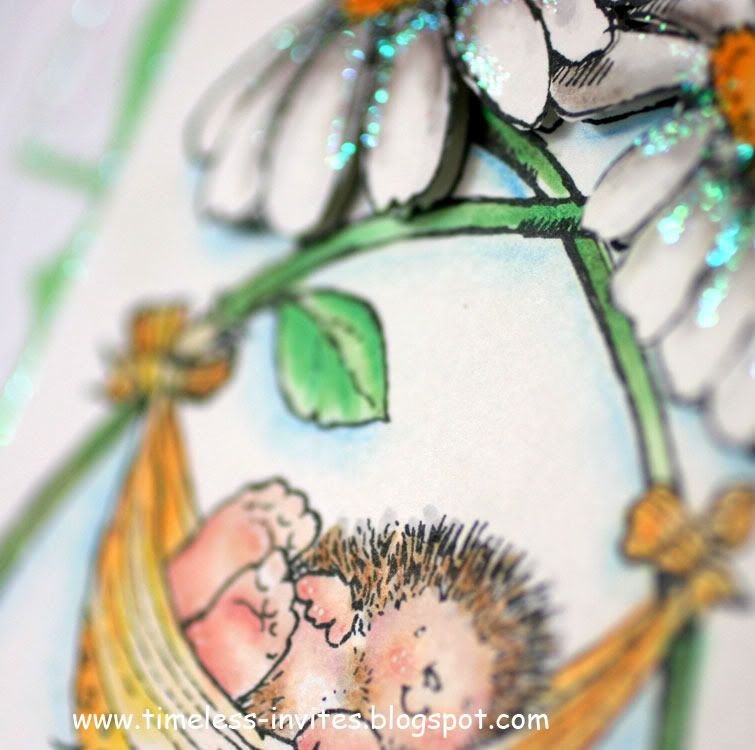
I double layered the daisies at the top of the card.

Photobucket

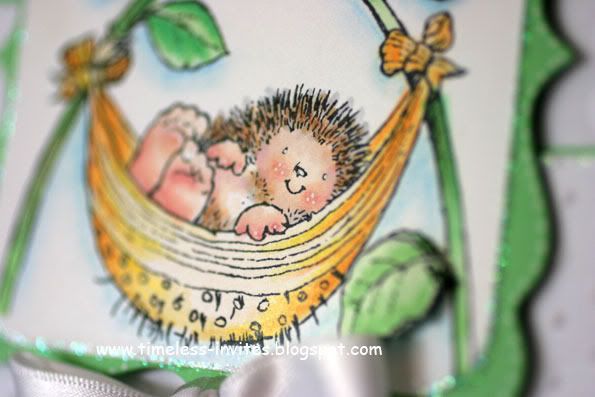
Here's little cutie-pie Hedgebaby looking oh-so-sweet! And finally -

Photobucket

Just a quick look at the main part of the card - I know the PB hedgies are grey.. but I wanted mine to be brown to look like little Hyacinth that we had years ago. She was a little teeny tiny hedgie that we overwintered as a rescue.. she was a right little tubber in the summer when she went out into the wild. Lovely to see her go, and hopefully she went on to live a happy life.

Right.. I've got to get cracking on some samples and bits.. so I'll see you shortly!
Animated Social Gadget - Blogger And Wordpress Tips