Showing posts with label colouring pencils. Show all posts

Wednesday, 26 October 2016

Little Angel...

Yes, I'm afraid I'm in full Christmas card swing now... and it's been really lovely to get time to sit and make some, and also share my makes on here with you all. 

So, what have I got to share with you all today? Well, it's this sweetheart here. The cutest little Angel there ever was. You can paper piece her, stamp and colour her, doodle in her, the choice is entirely upto you. 

But on this card below, I chose to colour her in very simply using my new Colourista pens and pencils - and as you can see, they work amazingly well. 


There are a few different things I've used on this card, and I will be sure to list them at the end of the post. 


These fab little sentiment tiles would have been so easy to make had I thought about it, but I didn't, so a random purchase a while ago from Hobbycraft bought them home with me, ready for that perfect card.

So here she is - my little Angel, in all her finery. I will list all details at the end. But as you can see, the base colouring was done by stamping in Momento, as I was using permanent colours to colour in.  
I coloured in using the Spectrum Noir Colourista pencils and pens. I found the pens to be lovely with the brush nib - very precise. And then topped it up with the pencils too to deepen the shades. 


On this pic, you can see where I opted to use the foils that I recieved from Stix 2. These are nice and so easy to use too.... and lovely to enable you to add a bit of luxury. 

So - here's your step by steps etc. 
  1. Take your 8" x 8" card and cut some gold mirror card and patterned paper slightly smaller in layers using your Layer Perfect tool. Stick these together and attach to the card blank. 
  2. Take a contrast paper and cut out with a circle using your Layer Perfect tool too. Really easy to do this!
  3. Cut a strip of gold mirror card to around 2" wide x 7.25" long. Cut a piece of patterned paper to 1.75" wide x 7.25" long and stick together. Wrap a length of ribbon around the whole piece and then attach to the card. 
  4. Stamp your image using Momento Tuxedo Black and colour in with your chosen pens or pencils. Add some sparkle with your Sakura pens. 
  5. If you take your Stix 2 2 in 1 glue pen, draw around the pieces you want to foil and leave to go clear. (It goes on blue - permanent adhesive, dries clear - temporary adhesive) Then pop your foil sheet over the top and rub over to adhere the foil to the glue. 
  6. Cut out leaving a small border, then layer onto a piece of mirror card. Trim to leave a small border. You can measure this very easily using the Layer Perfect. 
  7. Attach the angel topper to your card using Stix 2 silicone adhesive. *I opted to use silicone because you have different depths underneath the topper, so the silicone will adjust the height accordingly*
  8. Finish your card by adding a bow to match your ribbon, a central flower and a board sentiment. I also added a wooden heart and some pearl drops around the design. 


I hope the steps make sense... really, you can just have a play with the topper once you have coloured her in, or paper pieced her. She will look beautiful whichever way you play with the stamp. 

Here are the bits I've used in my card. I would love to see what you have made... please share! xxx

SHOPPING LIST

Stix2 S57321 Layer Perfect Tool
Stix2 S572269 Tape Runner
Stix2 S57109 Transfer Foil
Stix2 2 in 1 glue pen
Stix2 S57100 Silicone Adhesive
Woodware FRS223 Patch Angel stamp
Sakura Stardust pens
Colourista pens and pencils
Momento ink - Tuxedo Black (if using alcohol pens. Stazon if watercolouring)
Dovecraft Winter Blooms paper pack
Hobbycraft Mini Christmas Signs
Hobbycraft Wooden Heart Topper

Thursday, 13 February 2014

Hope you didn't hold your breath??

Morning folks.

I know, I know, I know... I promise to write more often, but it was one promise that went awry!

I have had a bit of a busy time since Christmas, but am now looking at a few weeks off work which will let me finally finish sorting out my craft room and get some crafting in FOR ME!

You know how things get. You look in your diary and it looks a bit empty for February, then something pops up and you get offered something to do. That's what happened last week with Tonic. I was asked if I could cover for Jodie at a show in Manchester and after a nano-second thinking about it, of course I said YES!

I love Tonic products and I love die cutting. So it was really a win-win situation for me. I met lots of lovely crafters and some familiar faces too. I even managed to buy a few things for my new room. And a new bag. My bag is pretty awesome and has lovely owls on it!

Anyway.. enough of my coming's and goings.. and here's a little card for you.


The image that I've used is a digi I have on file from a long time ago. In fact, the image was coloured a long time ago using prisma pencils. She kept popping up on my desk when I was sorting out my room, and finally thought to myself she ought to be put on a card!

I have used the lovely Tonic border punch at the top and bottom and used the offcut from the punch to create another flat layer on top. I added some pearly dots and glitter too. Go me, eh?!


I also coloured this one in too....


She's a Penny Black image and one that's been in my Stamp Collection for a while (uninked like alot of others!)

Isn't she just lovely? She was coloured with alcohol markers (a variety of different ones!) and a new aquisition to my crafting stash - some Pitt Pastels. Thanks to Jak, who convinced me I needed them... and yes, I love them lots!

She will be put onto a card later when I've had another cuppa and done the wooflets breakfast. I WILL try to get back later to show you the finished result.

Right... must make a move... whatever you're doing today, do it with fun.

Happy Crafting!!

Tuesday, 2 April 2013

Peek - a - boo ... and a cutie or two...

Yep. It's me. Sorry it has been a while since I last posted on here, but things have been a little 'odd' this past few weeks... not going into too many details, as it's personal, but let's just say, I am hoping for no reoccurance of what happened, and keeping my fingers crossed that normal service has resumed (well, as much as it can do!)

Anyway... enough about that... I have spent a few days recently just sitting and not creating anything. You know what it's like when you have worries that take your mind elsewhere, and thinking and worrying just takes over the creating. But I have made samples for my demo's - and I have been to some fantastic little shops this past month (Derby Garden Centre, Gadsby's and Ackworth Garden Centre to name a few!) so I do have plenty of samples to take photographs of and upload to show.

But for today, I wanted to share this little beauty..


As I say, I have spent some time getting back into crafting, and colouring is definately the best way to start for me. This image is a Sherri image, just love the cuteness... 

I have also been colouring the Gorjuss images from Docrafts. Have you seen them? I must admit I am loving them... I do have my favourites, and here is one of them... 


Isn't she a cutie? I decided to colour this one in with pencils, and kept it to a one layer card just using clouds to finish the background.

You really need to check out the Gorjuss papers and packaging too... it is all just so lovely! I have to stop myself from using them just for me - although I did treat myself to an extra packet or two... lol. The packaging is recyclable and the papers are beautiful. Especially the darker tones, which I didn't think I would end up liking too much.

This week, I am cracking on with some extra samples for an upcoming Create and Craft show, and my demo in Derby Garden Centre on Saturday.

AND... I totally need to share - I am also going to be teaching a class over at Ackworth Garden Centre after the Easter holidays. Exciting times eh? Let's just hope things stay on the straight and narrow for a little while.. lol.

I promise to share more projects soon... take care y'all... Happy Crafting!

Friday, 22 March 2013

Answering a few questions...

Hi all...

Just a very quick post this morning as I really need to get on with some work, and I've had a really bad couple of days... but quite a few folks have messaged me regarding a card I made on Create and Craft last week.

I had coloured an image using my watercolour pencils, but blended it with a paper stump. Now, for those that asked, in the jar I had the sponge part of a washing up sponge plonked in the base of the small jar (mine was a baby food jar, but you can use one of the mini jam jars) and then soaked it in sansador.

Sansador is what I use because when blending it stays nice and dry and means that I can blend tones on top of each other. Now, you can also use baby oil (small amounts of!) and also white spirit. The sansador is basically white spirit with the fumes taken out..


As you can see, you can get a really nice textured blend using the stumps. Now, you can also use water to blend the pencils, obviously, but this gives quite a light, watercoloured type of image, whereas the effect I wanted was a little darker and more tonal.


The other thing that was asked, was about what colour I use to stamp the outline with. Usually, I tend to stick to black, well... I say black, it's actually Coal Black from Ancient Page, which gives quite a light black, more a grey, colour. I find this less harsh than a solid black. 

On the image above, I used Artiste Chocolate dye based ink pad. Now, remember not to use the dye inks when you are using water, but if you're using blending solution, then dye or permanent ink will suffice. 

Using the chocolate dye based ink as my outline meant that I could add darker tones around the edges to blend in the coloured edges, giving an overall softer look. 

Is that okay? 

I hope I've explained everything as you asked... I hope it helps a little. xx

Tuesday, 5 March 2013

Busy days = no posts!

Hi everyone..

So sorry for the delay in posting for the past few days. I've been a little bit busy with making sure I had some great samples for my demo last Saturday at the wonderful Craft Central in Derby. Now it was a very special day there too, as we all celebrated (and a few of us were very lucky to cuddle...) the birth of baby Leo. He has been a much awaited grandson of a lovely lady who comes in to watch my demonstrations. And there were cakes too. All made by the lady herself as a celebration treat. Wasn't that lovely?

I also had some magazine commissions to finish off and post, some Create and Craft samples to complete and lastly, some projects for the upcoming filming of Creativity TV! No rest for the wicked is there... although I don't think I'm that wicked really. I love my job, and wouldn't have it any other way than busy. Its the best way to be I think.

Anyway.. tonight, I thought I'd bring the laptop upto bed (for a change!) and lay here to post my little bloglet for you.

I have really wanted to share this little card with you for the past few days, but only just gotten around to taking the photo off my phone. (new phone = no idea how to extract photos without a wire!) Oh the joys!!


I can tell you, I'm soooo in love with this fantastic new range from Docrafts. This is the new Forever Friends range and it is stunning! It's called Kraft Notes and honestly, the papers are just divine. They look quite vintage and as you can see, I thought a perfect combination to go with the kraft card.


I coloured the little bear with pencils to give him a really soft, fluffy look. Isn't he just the cutest?! This is one of the larger stamps from the set of four that have been released, and I definately think the others will have to make it to my collection!

Obviously there are more than just stamps and papers in this range... there are fabric papers, toppers, ribbons, bows and decoupage.. and lots more! So, if you're not really into stamping, then you can create the card below using the same image as above, but in decoupage form.


Again, I've used kraft card as my base, and cut the star from the self adhesive fabric paper.. I have great plans for this paper, but firstly I need to purchase another couple of sheets!! I'm hoping it doesn't fly off the shelves too quickly before I can buy some.

Here's a close up of the details for you.

Well... I'm going to get off and sort out my next project to share with you. It's something a little different, but I know you're going to love it! Until next time.... happy crafting!

Thursday, 28 February 2013

Nearly Easter choccie time...

Morning all... well, after a sod of a day yesterday with one thing or another, I decided to go into my Craft room and chill doing a little bit of what I love bestest. Colouring in. And here's what I managed to make... 


Sometimes, don't you just have those days where your inner feelings nag away and overthinking takes priority? Well, yesterday was one of those days... all my cards and projects were rubbish, I hated everything I created, and other feelings that were buzzing around my head. So last night was the last straw really, and I thought 'chuff it' and decided to create a little bit of something just for me.

I'm sure it's just the creative mind to be honest, as most crafters I speak to have little confidence in their work from time to time. Pair this up with anxiety and it makes the perfect combination for feeling out of sorts!


So... my little colouring expedition used pencils, just back to colouring, blending and having a little fun... and this little cutie was born... I did look round my pile of print outs for something to colour, and as I have a range of these beautiful Besties printed out, it just had to be one of those didn't it... lol.


I went with a very simple colour palette of blues and pinks - two of my favourites - and as you can see, added some irridescent glitter glue to the frill of the dress.


You see my doily? OH HOW I LOVE MY DOILY!!!! This is the reject section from my Xcut doily die and guess what... it's just a j-cloth wipe...

I tend to use a dry baby wipe or j-cloth to help cut out my intricate dies, and this was a remnant of the said piece after my demo last weekend. So I decided to add it to my card as the base was a blue colour. I inked it up with Chocolate Artiste inks and plonked it behind my layer.


The papers are from the digital downloads on the Creativity Club. Have you checked them out?? Blimey, there are some right beauties on there and this one with the flowers, hearts and plainer background work perfectly with this image.

Well... that's all I have for you today.. more tomorrow - and something that I'm pretty sure you're going to love...!

Until then... happy Crafting everyone!

Friday, 22 February 2013

Two shades of blue..

Hi-de-hi... Evening campers...

How are we all?

I've had a full on sort of day today - starting off with adjusting a little pattern I'm creating at the minute for the Creativity magazine, then straight onto pom poms, funky foam and felt! I've been preparing for a demo this weekend over at Ackworth Garden Centre, and it's a childrens demo this time.. so there'll be lots of ideas and inspiration for children of all ages - including mine!

Tonight, however, I want to share a little make with you and it's another Bestie girly. Loving these images so much at the minute. They are a doddle to colour, and of course, because they are digis, they can easily be put into the Digital Designer and resized accordingly to fit onto your card.

Here's the finished card..


I've kept the layout quite simple, mainly because I think the image needed to be kept nice and focal, so I decided to just add a bit of a handmade bunting, and a punched border. I'm not one for using too many flowers on my projects... I tend to like my cards less cluttered.


Here you can see the colouring in slightly more detail. I've used pencils for this card, just laid on quite thick and blended out a little. And she's got the perfect little cheeks to add some blush too... isn't she beautiful?!


I've added some glitter glue to the skirt and around the ears and tail, and also some Anita's 3D gloss to the shoes to give them a little shine.


And here's the bunting.... simply made from the fantastic Papermania twine in pale blue, and some craft tape over the top, folded then cut to a flag shape... simple!

I really hope you like the card tonight... it was made in about an hour, so a bit more rushed than usual.. but hey.. time waits for no man (or woman!)..

I'm entering this into the Besties Challenge - Two shades of Blue.

I'm also entering it into the following challenges.

Well.. that's it for tonight... my bed is calling me and the woofers are snoring like troopers!! Night all..... 


Tuesday, 5 February 2013

Finally creative...

Hello all..

Firstly, sorry for missing over the weekend, but with a demo at Craft Central last Saturday and one or two other little niggles, things have been a bit amiss.

My demo was fab. The store was fab. Customers were fab. Jackie was wonderful and entertaining as always, and our little Connie - well, quiet but lovely. I had a totally smashing day, and it went as quick as anything. The amount of customers who came to say hello, and sit and watch for a while was outstanding. Very busy indeed !! All in all, a lovely day.

On the way to lunch, we came across this cheeky little fella, who was singing his heart out a few inches away from us, so I grabbed my mobile and snapped this pic... isn't he beautiful?


On Sunday, I was doing removals... oh, and a bit of shopping! Firstly to town to buy a couple of bits we needed, then onto the removals! All my 'overflow' craft items are now safely and securely in storage and my shed is looking emptier! Just a few empty boxes to take to recycling and job done! Now, if I could only stop myself from going into a cold sweat when I think of sorting out the craft room to put some extra bits into storage.....!!!

Anyway, onto today's card, and it was one I wanted to make to send to the vets we use. As you know, we had our little Kiara put to sleep last week, and today, totally by surprise, we recieved a lovely card from the vets to express their sympathy. Now, we've been with the surgery for over 20 years and have never - in all the time we've been with them - recieved a card to say 'sorry for your loss'... but the surgery changed hands last year and the vets that have taken over are really lovely. Dewi and Andrea are so caring, and their attitude towards everything is really lovely. That extra step means something special, don't you agree?

So here's my card ..


I decided to keep the card really simple. I've stamped the image and coloured with pencils. Then it was die cut with a frame and inked clouds added to give a little background.

The card base is one of the lovely Papermania embossed cards. They are just fab for quick, easy cards.


Isn't the cat just the cutest? I've tried to colour it in the same sort of shading as Kiara was, although she didn't have a white tip to her tail. lol.

 Of course, it's obligatory that my animals always have to have flushy cheeks, so a little pink pencil and a dot or two of white gel pen fixed that pretty sharpish!

 I pierced the edges of the layer just to add a little bit of a difference, and also because I didn't want to layer up the card again, it just added decoration.

Well, I hope you like today's card.... it will be posted tomorrow when I can think of what to write inside it.

Until next time, happy Crafting... xx


Sunday, 5 August 2012

Sweet and simple

Oh wowsers... I've discovered Saturated Canary... I know, I know - I take my time.. but the SC love has just bitten me and I have now got my very own little collection! Look at her, isn't she sweet?!

With this card, I thought I'd use some older papers, which I think are Papermania but not too sure.. as the packet was already open and didn't have a label in.. dippy me!! Usually I keep those sorts of things.

I've coloured her in with pencils and blended them. The colouring is alot brighter in real life. (note to self... remember to use my proper grown up camera and not the phone!)
Here's the close up of the image... I just think she's adorable.

Well.. tomorrow is the release of our second Crafty Bloggers Network Challenge.. I hope you can pop by and join in the Challenge... It's a fab one this week with TWO sponsors!!! I'm not saying any more.. just pop by and join in.. it'll be fun!

I'd like to enter this card into the following challenges...

NMWC - Anything goes
Catch the bug - Anything goes
Challenge up your life - Everything goes
Send a smile 4 kids - For the girls

Happy Crafting for now. xx

Thursday, 2 August 2012

A colouring session....

Yawn.... . I am so tired today... it's been a very long day, and I've been to Peterborough to a guest slot on Create and Craft for Docrafts. Two shows, early start at 8am and 11am.. and it's left me feeling a bit tired after only a few hours sleep.

However, tonight, after hubby went off to work, I thought I would sit and sort out my bag to put things where they need to be. I then remembered about some images I'd had sat on my laptop that I needed to reprint as I'd given my friend Tracey some to colour in. So, I got out my laptop, fired up the fantastic Digital Designer program from Docrafts, and get my images printed out.

The Digital Designer makes it really easy to print out images to the right size as the A4 sheet (which is what I use) has measures around the outside, so I can instantly see what size I need to print...

These are the images as they had been coloured in. (sorry about the pics.. they were from my phone)

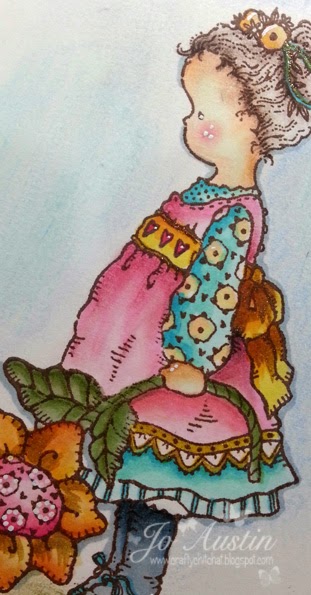
This one just has to be my favourite... she's really lovely and reminds me of my two girls when they were younger.

I have found some new pencils that work in the same way - only better!! - than the Prisma's I have.. and they are really easy to blend too!! I'm not revealing what they are yet - but watch this space!

.. aren't they pretty?


And here are the three lovely ladies together... keep an eye out for them appearing on a few projects soon!

Anyway... I'm going to love you and leave you, and go to sleep... my eyes are drooping as I'm sat here!! I'll be back soon to show you the finished cards too!

Happy Crafting!!
Animated Social Gadget - Blogger And Wordpress Tips