Evening all....
Just catching up on a little blog post for tonight, and this is one that I wanted to post and tell you all that I appreciate you all popping by and visiting my blog. I've had a few quiet days at home this week, which has been really nice - catching up on the DIY jobs that need doing, as well as a little cooking and baking and creating along the way.
As you may know, this week has seen the release of our fantastic new Tonic Rococo dies, both the larger and mini versions, Fairy Collection. What a lovely set it is too... although I am a little partial to the Moon - Luna - if I am being honest.... !
It is a lovely size to make that feature on your cards, as you can see with the cards below. But there are so many possibilities with it.
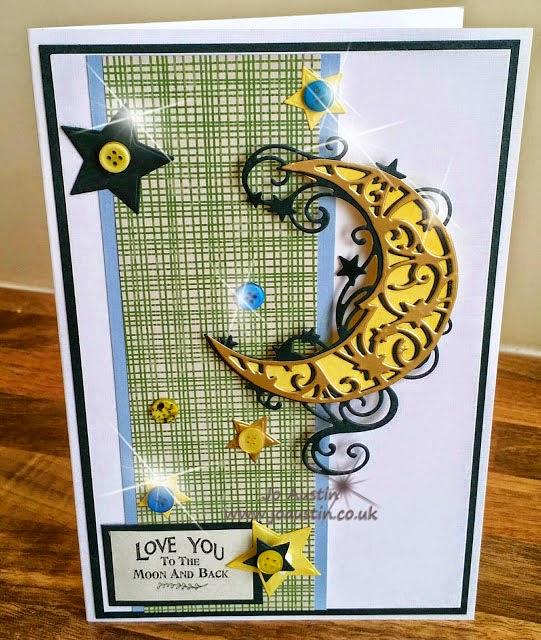
This first card was a smaller size card, which is perfect for those of you who are just starting out with your crafting, and may not feel comfortable using lots of dies, or lots of empty blank areas. I cut a couple of strips of card and paper to fit onto the front of the white panel then cut out the moon in a few different colours.
The first cut was with the gold, then stuck onto the darker green cut. I attached both of these layers onto the yellow cardstock, then cut around the outside edge of the moon to give it some background colour.
The little stars were waste from the collection of other cards that I had made, and also a couple of larger ones from the star layering dies. A little button was attached onto a few of them, and also dotted around the card too.. just for a little bit of a difference! The sentiment was one from East of India, which I picked up at a Garden Centre whilst out with our Jodie... I'm sure you will be able to find something similar.
Now, the card below was another quick card using Luna, and also the fairy wand. I found the sentiment on the internet, and thought it was lovely... so printed it out using the computer, and layered it up onto my cardstock. The moon was attached with hot glue into the corner of the card, and the wand was layered up and glittered. Quite simple card really but I think a little effective.
The little strapping around the bottom was made by measuring very roughly on the guillotine to create the angles, then an eyelet was added to hold it together. The string was tied loosely and the wand attached behind it.
Well.... I hope you like the couple of cards for today... I will be back with a few more samples for you over the next day or so..... so I hope you can pop by then.
Happy Crafting until then. xxxxx


I love the sentiment on the second card, Jo! Both cards are fab, it's great to see some smaller, less intricate cards that we can make quickly. Thank you very much for sharing.
ReplyDeleteLove both these cards thank you for the inspiration. I have been card making for some years now but still pretty basic with my cards especially compared to the dt and Jodie but I do love my dies. Thank you for the less complicated cards ideas - it's been a great help.
ReplyDelete